
Model painters commonly use an air brush and/or paint brushes. You can achieve excellent results with either type with some basic knowledge coupled with practice and patience. This article describes basics to consider when using paint brushes in modeling and offers suggestions to help you get started.
Brushes
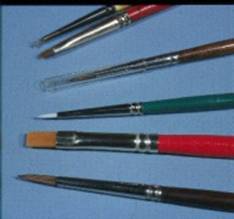 Brushes come in pointed and flat (square-end) designs, with sable hair (red)
or synthetic (white) bristles. Use
pointed brushes for detailed work, and flat brushes for wide areas,
like the sides of a building. Keep the protective clear cap on brushes,
as that protects the pointed bristles. When brush bristles become worn, retire them from painting service
to weathering and staining applications.
Brushes come in pointed and flat (square-end) designs, with sable hair (red)
or synthetic (white) bristles. Use
pointed brushes for detailed work, and flat brushes for wide areas,
like the sides of a building. Keep the protective clear cap on brushes,
as that protects the pointed bristles. When brush bristles become worn, retire them from painting service
to weathering and staining applications.
Inexpensive Acrylics
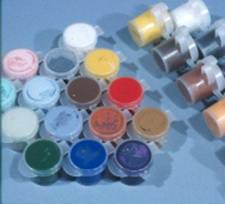
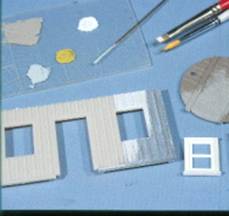
For about $5, acrylic colors (up to 20 different hues) can be purchased at discount and craft stores. The paints are sold in plastic pop-top type holders similar to those shown in photo 2. These acrylics are relatively thick, and can be used to impart texture, or thinned slightly for smooth surfaces. Regular tap water works well for dilution. They dry quickly (in less than three minutes) so you have to work quickly. Transferring the paint to a plastic or glass pallet (such as shown in photo 4) is recommended. After removing a small amount of paint to a palette or working surface, close the container lid tightly to prolong the paint’s life.
Painting Goals
Imparting a realistic color and accentuating detail are goals to strive for when painting your models. Avoid bright or dark colors, by making them more pastel or gray. And since our models are too small to cast their own shadows, accentuate detail by painting highlights or shadows. A thin brown or black wash that settles in cracks and crevices is good for shadows. For highlights, lighten the base color with a bit of tan or gray and lightly brush over the highest surfaces.
Painting Methods
Systematically applying paint over a model surface will improve the application. One of the drawbacks in brush-painting is brush marks showing up on the model surface. Putting a moderate amount of paint on the brush bristles minimizes brush strokes. When painting wood structures or details, this can be easily disguised as wood grain, if brushing is along the length of the boards or planks. Typically, rapid and uniform brush strokes over the length of individual items will minimize brush marks.
A few good habits will extend the life of your brushes. When working paint into the bristles, only allow paint into the first half of the bristles. If you dip brushes up to the metal ferrule, paint will accumulate and eventually spread the bristles apart. And as soon as you're finished painting, clean you brushes by alternately wiping and swirling through solvent. Avoid placing brushes in solvent bottles, as the weight of the handle will bend the bristles. And when clean, use your fingers to gently reform the original shape (whether pointed or flat) of the brush so it dries that way and is ready for use next time. When I want to store my brushes, I prefer to store the brushes standing on their handle end, in a simple plastic rack. A jar or box would also work.